

Happy New Year! This may be posting a week or two late (I’m not in charge of when my posts actually post….) but I wish you all a year of health and prosperity! I took a couple weeks off over the holidays to reflect a bit on the past year and to make some tentative plans for 2018. That, of course, meant planning for my recipe posts! I have enjoyed being a guest blogger on this blog. Your comments when you have tried the recipes have meant the world to me! So allow me to say thank you, from the bottom of my heart, for your support and encouragement over the past year.
California Girl Comments: Ms. April is, in fact, a full partner blogger on this website and her recipes have been liked by top Chefs all over the world! She was recently called a real treasure by one of our readers in a comment and I have to agree – she is!
I was pondering some of my favorite dishes, and decided to start off the year with a recipe you can use all year long in future recipes. It’s a must-have, and you seriously have to master it! It is perfection! I have been using this recipe since childhood, as it was taught to me by my mother, and by her mother before her. I was told to never write it down and to commit it to memory because it was indeed a family secret. I remember often how guests that sampled my mother’s pies would just compliment her delicious, flaky crust and beg for the recipe…mother would always say she just “threw it together” and didn’t have an actual recipe. Hmmmm….

California Girl comments: I am going to admit to you I can’t make a pie crust to save my life. Seriously, I think I was holding the door when God blessed people with pie making skills. I nearly cried one year when Ms. April asked for a pie for her birthday. I felt like I was going to hyperventilate. Thankfully, instead, I was able to make her one of my specialty cheesecakes which made her happy.

So it is with the tiniest bit of guilt, and months of actually considering whether or not I would share it, that I give you our family Perfect Pie Crust Recipe. The secret is not as much in the ingredients, as it is in the actual making of it, so make sure you pay attention!
Calfornia Girl comments: Ahem! Just so you know, as close as we are she has never shared this miracle pie crust recipe with me! I see how it is. She only shares with her closest fans. Uh huh. You all see this right?

You will need:
4 cups of all-purpose flour
1 TBSP sugar
2 tsp salt
1-3/4 cup shortening
1 TBSP apple cider vinegar
1 egg
1 cup ice water

1. In a large bowl, whisk together dry ingredients.
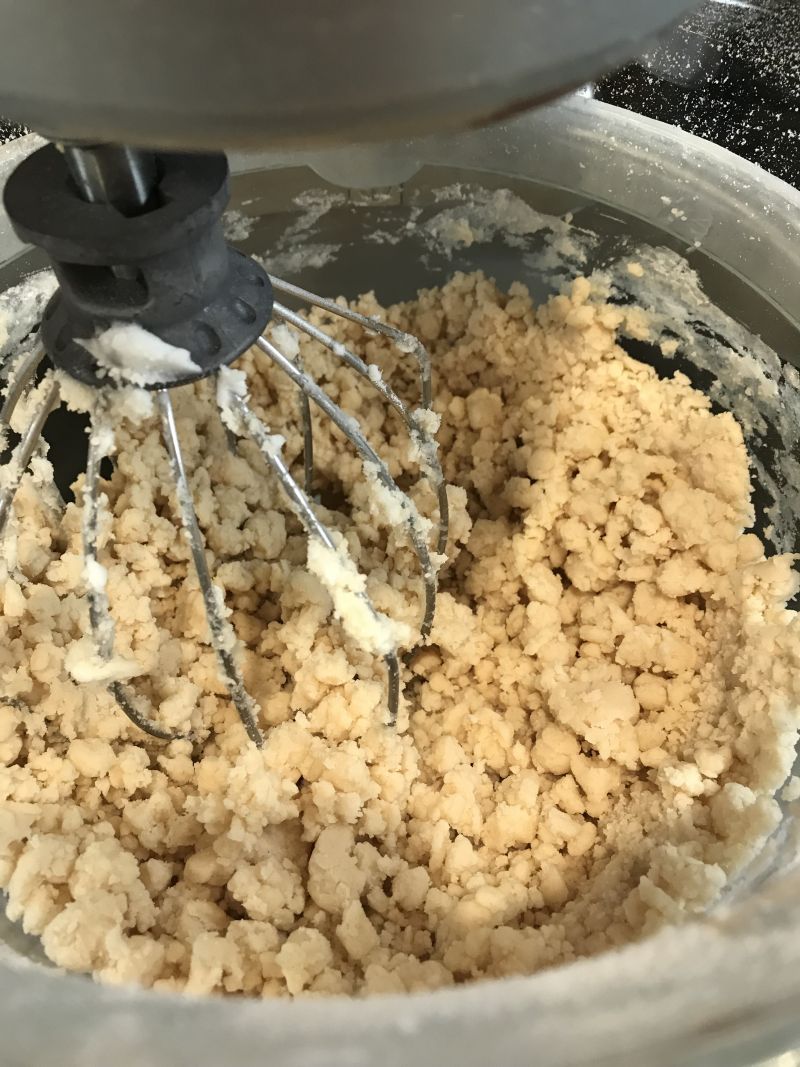
2. Using a pastry blender or fork, blend in the shortening until the mixture is crumbly.
(If you have a Kitchenaide Mixer, just dump the dry ingredients and the shortening in the bowl, and using the whisk attachment at 1/3 speed, mix until evenly crumbly.)
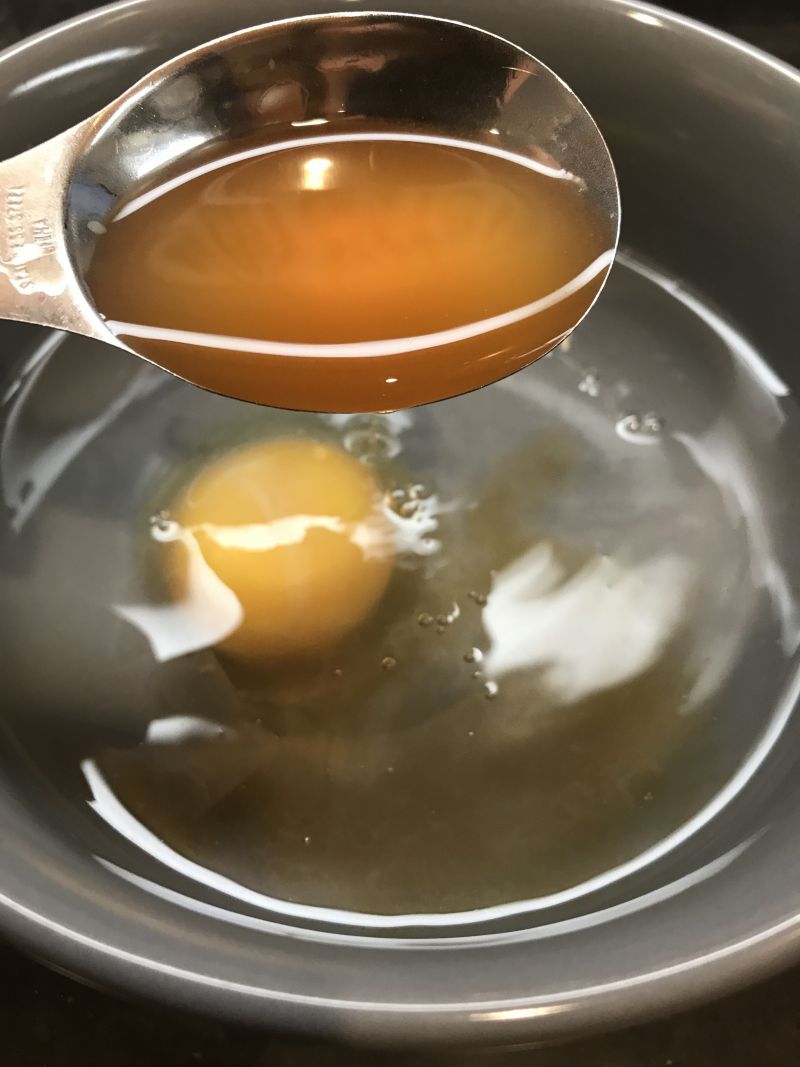
3. In a separate bowl, whisk together the vinegar, egg and ice water. (I actually fill a glass with ice and then water and let it set; strain the water off the ice into a measuring cup. IT HAS TO BE ICE COLD!). The mixture will look light yellow and the egg will be completely dissolved in the vinegar.

4. Pour the egg/vinegar/water mixture into the previous mixture of flour/shortening. (AND HERE IS THE MOST IMPORTANT PART!) Using a rubber spatula, gently fold the mixture together until it is evenly moist. DO NOT STIR OR OVER MIX! The mixture will be very lumpy and sticky. If you overwork it, you will have a crust that is not tender, light and flaky.

5. Tear off four squares of waxed paper. Using the spatula to scoop out the mixture, place approximately 1/4 of the mixture in the middle of each piece of waxed paper.

6. Fold waxed paper over the dough mixture as if wrapping a package. Place in the refrigerator for at least four hours to chill. (These will keep in the refrigerator for up to 5 days)

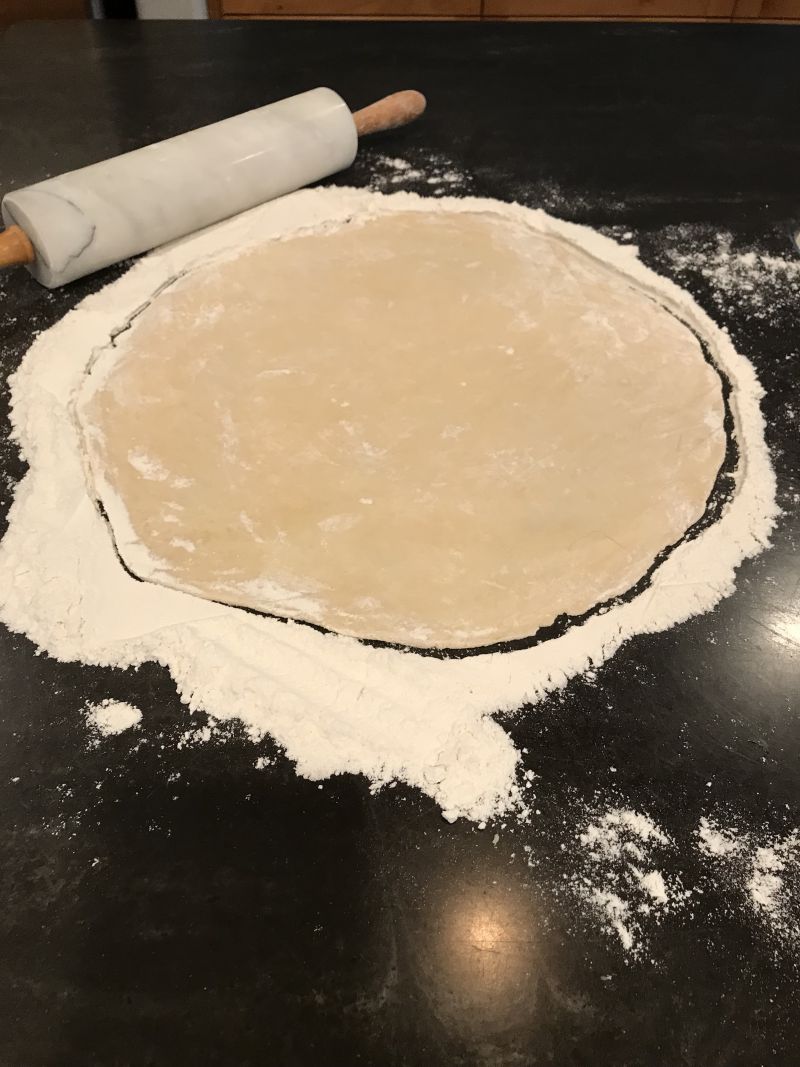
7. To use, remove from the refrigerator, and with floured hands remove the dough from the waxed paper. Gently work the dough in your hands for about 30 seconds to blend it a little better. DO NOT OVERWORK IT!
 8. Shape gently into a round “patty” shape, and on a floured surface, roll as usual for a pie.
Now, who needs four pie shells? Not me! So, the wonderful thing about this recipe is that you can place those waxed paper wrapped patties of dough into a freezer bag and pop them in the freezer for up to 6 months! When you want to make a pie, just bring it out of the freezer and allow it to thaw on the counter. Then, proceed to step 7 and work it a little bit and roll out! One package equals one pie shell, so if you have a pie with a top crust, you will need to use two packages.

Next week, I’m going to share with you an old-fashioned pie my great-grandmother used to make me when I was little, so save one of these pie crusts this week so you can whip it up when the blog comes out!
Have a fabulous week~ Ms. April


2 Comments
that looks easy enough for me to give it try!
Pingback: Recipe of the week - Fresh Strawberry Pie - April - Wine Travel Eats